Foot Massage for Plantar Fasciitis: 5 Techniques
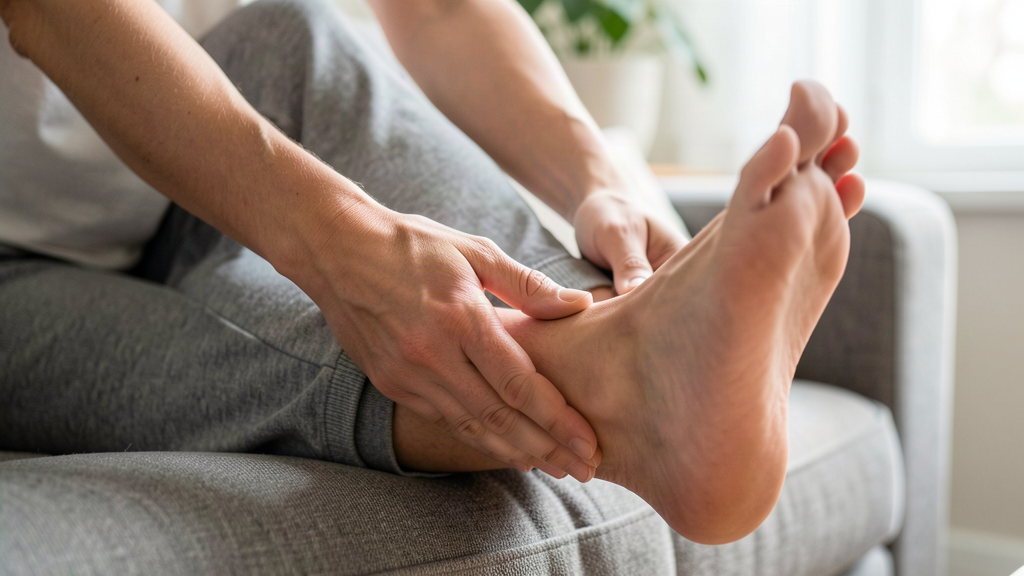
The math of plantar fasciitis is brutal: roughly 2 million Americans get the diagnosis each year, and the first step out of bed is the moment the irritated fascia takes its toll. Between those first steps and full recovery lives a toolkit of simple, free interventions — and foot massage is the most accessible one in the box. Your two thumbs cost nothing and are available at 6 a.m.
But not all massage is equal for an irritated plantar fascia. The wrong pressure at the wrong time can aggravate it; the right sequence — gentle warm-up, targeted pressure, ice finish — can turn mornings around. This guide walks through five techniques physical therapists commonly suggest, exactly how to do each, when each works best, and how to build them into a daily 10-minute routine.
Important: massage is a comfort and mobility tool, not a medical fix, and this article is general information, not medical advice. If pain is severe, one-sided with swelling, numb, burning, or lasted more than a few weeks, see a doctor or podiatrist first — heel pain has several possible causes, and some of them need professional treatment.
(As an Amazon Associate we earn from qualifying purchases. We may also earn commissions from brands listed.)
Why Massage Helps an Irritated Fascia
Three mechanisms make massage a staple of plantar fasciitis self-care:
- Tissue fluid movement. Steady pressure and strokes encourage local circulation — delivery of repair materials, removal of waste products — in a tissue that otherwise sits in a relatively rigid compartment.
- Desensitization. Pain science calls it mechanical allodynia management: structured, expected pressure inputs can gradually recalibrate how the nervous system interprets touch on a sensitized area.
- Flexibility work. Massaging the fascia and the small foot muscles reduces guarding, letting the tissue tolerate stretch before it takes load.
The key phrase is structured and expected — technique matters. Deep random digging on an already-irritated heel is how people make things worse.
Technique 1: Thumb Striping Along the Arch
The foundation move — a slow, firm stroke along the fascia itself.
- Sit with the foot across your opposite knee, sole accessible.
- Place both thumbs at the heel pad, fingers wrapped over the top of the foot for stability.
- Press firmly but comfortably — a "deep but not wince-inducing" 5–6 out of 10 — and slide your thumbs in one slow line from heel to ball of foot over 3–4 seconds.
- Return to the heel WITHOUT pressure (lift your thumbs, reposition — don't drag back).
- Work the whole arch in strips: inner edge, center, outer edge — 5 strips per line, 3 lines total.
- Finish the set with 10 lighter, faster passes to flush the area.
When to use it: evenings after long days, or as a warm-up before stretching. This is the "general maintenance" technique — if you only learn one, learn this one.
Technique 2: Cross-Fiber Friction on the Sore Spot
The targeted one — directly on the tender spot, across the tissue fibers.
- Find the sore point — usually the inner-front edge of the heel pad, sometimes mid-arch. Press around until you locate the spot that feels like a bruise under the surface.
- Place one thumb on it. Instead of sliding ALONG the fascia (heel-to-toe), move the thumb side to side across the tissue — small, deep, slow oscillations.
- Keep the depth at a "hurts so good" 6/10, never a sharp 9/10. Work for 60–90 seconds, then rest 30 seconds.
- Repeat for 3–4 rounds. The spot often feels warmly worked-out afterward — that's the goal, not numbness or sharp pain.
When to use it: on the specific tender spot, on alternate days. Skip it entirely on days when even light touch hurts — that's the nervous system asking for calm, not depth.
Watch out for: working the same spot to bruising. Cross-fiber friction is a scalpel, not a hammer: 90 seconds is a session, not a warm-up.
Technique 3: The Heel-Pad Squeeze
The gentlest technique — for flare-ups and sensitive mornings.
- Cup the heel pad in both palms, fingers interlaced over the sole.
- Squeeze firmly but comfortably, hold 5 seconds, release slowly.
- Vary the angle slightly with each squeeze — left side of the pad, center, right side.
- 20 squeezes per session. The rhythm should feel like a slow blood-pressure rhythm, not a sports clap.
- Option: finish by drawing slow circles around the whole heel with both thumbs, light pressure.
When to use it: first thing in the morning before getting out of bed, and any flare day when deeper techniques feel wrong. It's also the natural gateway between pain and the deeper techniques.
Technique 4: The Frozen Bottle Roll
The classic dual-purpose move — ice and massage in one, straight from the physical-therapy playbook.
- Freeze a full water bottle (or a dedicated foot-roller bottle) lying flat in the freezer.
- Sit on the edge of a chair, place the bottle under the arch.
- Roll the foot over it from heel to toes with moderate pressure — your weight does the work — for 3–5 minutes.
- Keep the foot moving the entire time; never park the ice on one spot for more than a few seconds.
- Best done after a day on your feet, not first thing in the morning — ice first thing can make cold, stiff tissue even stiffer before the day's first steps.
When to use it: end of day, high-load days, or any evening when the arch feels hot and swollen. Our foot roller guide covers purpose-built alternatives if a bottle feels too basic.
Technique 5: Toe Flexor Work — The Overlooked One
The secret weapon — because the plantar fascia anchors to the toes, and tired toe flexors pull on it.
- Sit with the foot accessible. Interlace your fingers between the toes (gently — think hand-in-glove, not force).
- With your other hand, thumb-strip the ball of the foot (forefoot pad) for 30 seconds — this area takes huge loads and is almost never massaged.
- Gently pull each toe toward you, hold 3 seconds, release — one at a time, all five.
- Finish with 20 slow "thumb-walking" presses across the ball of the foot, and 10 gentle stretches of the big toe (pull up and slightly toward the ankle).
- If reach or flexibility is a problem — and over 50 it often is — use a foot massage ball or a long-handled toe separator as an assistant. A massager with toe compartments (see our plantar fasciitis massager picks) automates part of this work.
When to use it: 2–3 evenings per week. People who add toe work to fascia work often describe the difference as "the arch finally lets go."
The Daily Timing Routine
| Time | Technique | Duration | Why this timing |
|---|---|---|---|
| Before first steps (in bed) | Heel-pad squeeze (T3) | 1–2 min | Calms tissue before the day's first load |
| Before first steps (in bed) | Optional: gentle calf stretch | 1 min | The fascia's neighbor — calf tension pulls on the heel |
| Evening, day 1–2-3 | Thumb striping (T1) + toe work (T5) | 5 min | Maintenance + flexibility |
| Evening, alternate days | Cross-fiber friction (T2) | 3 min | Targeted spot work |
| After heavy days | Frozen bottle roll (T4) | 3–5 min | Ice + massage for hot, loaded tissue |
Pro tip: link the routine to something you already do every evening — the moment you sit down after dinner, the bottle comes out of the freezer. Habit-stacking beats willpower.
Common Mistakes
- Going too deep on flare days. Sharp pain during massage means back off — depth is earned, not forced.
- Massage as the only tool. The fascia takes load every step; footwear and insoles (see our insoles guide) change the load itself, not just how it feels.
- Skipping the morning window. The 2 minutes before first steps are the highest-value minutes of the day.
- No ice on hot days. A swollen, warm arch after a 12-hour shift needs the bottle, not more thumbs.
- Massaging the heel bone instead of the tissue. The target is the tissue around and ahead of the heel pad, not the bone itself.
FAQ
Does foot massage help plantar fasciitis?
For most sufferers, yes as a comfort and mobility tool — massage may improve local circulation, reduce guarding, and desensitize the area, which makes steps and stretches more comfortable. It's one part of a routine (with footwear, stretching, load management), not a standalone fix.
What is the best time of day to massage plantar fasciitis feet?
Two windows matter most: 1–2 minutes of gentle pressure before the first steps of the morning, and a 5–10-minute deeper session in the evening. Ice-based massage belongs at the end of heavy days, not cold mornings.
How deep should I massage an inflamed plantar fascia?
Work at a "deep but comfortable" 5–6/10 pressure on general tissue, up to a "hurts-so-good" 6/10 on a specific spot — never sharp pain. On flare days, drop to the gentle heel-pad squeeze only.
Is it better to use ice or heat for plantar fasciitis?
The common pattern: ice (or the frozen bottle roll) after heavy days when the arch feels hot and swollen; gentle warmth before activity on stiff mornings. Some people alternate — 2 minutes cold, 2 minutes warm — though evidence here is mostly experience-based, so let comfort guide you.
Can a foot massager replace manual massage for plantar fasciitis?
A good machine covers much of the same ground (our plantar fasciitis massager ranking ranks them), but machines can't do cross-fiber friction or toe work as precisely as thumbs. Best combo: machine for daily convenience, thumbs for targeted spot work.
How long until massage makes a difference?
Most people report the morning routine feeling easier within 1–2 weeks of consistency. Full resolution of a stubborn case takes longer — months of consistent routine, sometimes professional care. Consistency beats intensity every time.
Comments