KT Tape for Plantar Fasciitis: Application Guide
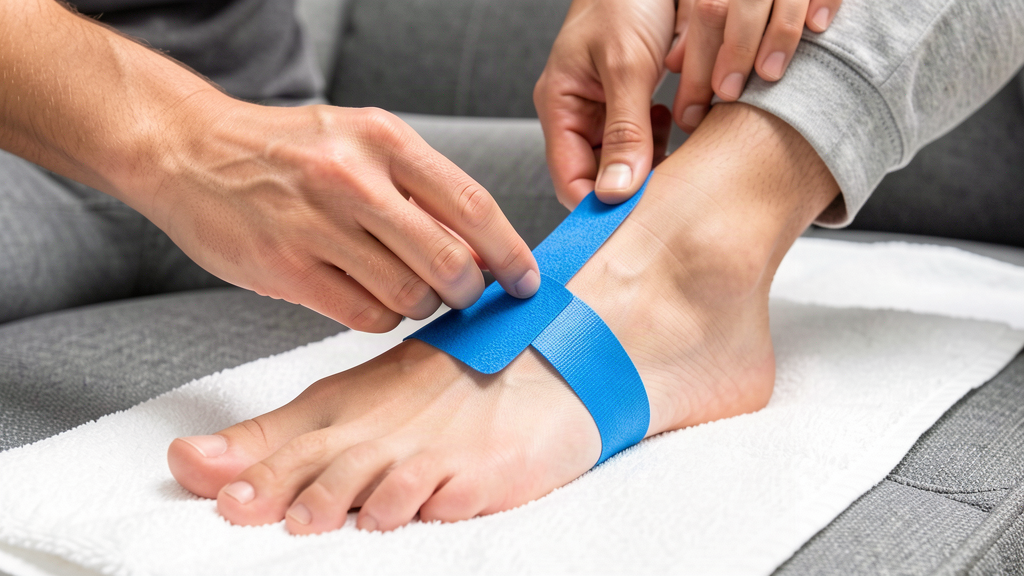
If you've Googled "plantar fasciitis tape" at 6 a.m. with a knife in your heel, you already know: the first steps of the day are the worst, and everything you do before them matters. Kinesiology tape — the stretchy, colorful tape you've seen on Olympic shoulders and marathon calves — is one of the cheapest tools for making those first steps bearable. A roll of KT Tape for plantar fasciitis costs about the same as a coffee and lasts through dozens of applications — which is exactly why applying KT Tape on plantar fasciitis has become one of the most-shared self-care tricks among heel-pain sufferers.
But tape only works when it's applied with intention. A sloppy strip does nothing; a well-placed one can support the arch all day like an extra ligament. This guide walks through what the tape actually does, four proven application techniques step by step, how long to wear it, and when to skip it and see a professional.
Important: plantar fasciitis taping is a comfort-and-support measure, not a medical treatment. If your pain is severe, worsening, or lasted more than a few weeks, see a doctor or physical therapist — persistent heel pain has other possible causes that need professional evaluation. This article is general information, not medical advice.
(As an Amazon Associate we earn from qualifying purchases. We may also earn commissions from brands listed.)
What the Tape Actually Does (and Doesn't)
The plantar fascia is a thick band of tissue running from your heel to your toes. When it's irritated, every step stretches it — especially the first ones after rest. Kinesiology tape supports the arch in two ways:
- Mechanical lift: applied with tension, the tape gently lifts the skin and supports the arch's position, reducing how far the fascia stretches on each step
- Circulation and feedback: the tape's pull on skin may encourage local fluid movement and constantly reminds your brain to shorten the step / soften the landing — a subtle gait change that offloads the fascia
What it does NOT do: it doesn't heal the fascia by itself, and it doesn't replace stretching, supportive shoes, or addressing the underlying cause. Think of tape as a tool that buys pain-free steps while the real fixes do their work.
Pro tip: tape + a structured morning routine beats any single trick. Our foot massage for plantar fasciitis guide pairs naturally with taping.
Before You Start: Tape Basics
Get these right and 90% of applications succeed:
- Use kinesiology tape, not rigid athletic tape. You need the stretch — KT Tape, TheraBand kinesiology tape, or any equivalent elastic cotton tape.
- Clean skin first. Wipe the sole and heel with rubbing alcohol to remove oils; tape on dirty skin peels by lunchtime.
- Shave or trim dense hair on the sole edges/heel if needed — tape doesn't grip hair.
- Round your corners. Cut the tape ends into rounded shapes; square corners catch on socks and curl.
- Apply 30–60 minutes before activity so the adhesive warms and bonds.
- Anchor without tension, stretch the working section. The ends of every strip always go down relaxed; tension lives in the middle.
Technique 1: The Classic Arch Support (Most Popular)
The workhorse application — one strip doing the job of a temporary arch orthotic.
- Sit with your foot relaxed, ankle neutral (not pointed).
- Cut a strip long enough to run from the ball of your foot, around the heel, to the base of your toes — roughly 10–12 inches.
- Tear the backing in the middle. Anchor one end (no tension) on the ball of the foot, just behind the toe pads.
- Stretch the middle of the tape to 50–75% tension and lay it along the inside of your arch.
- Bring it under the heel with the same tension, and finish by laying the final 2 inches on the outside of the foot with zero tension.
- Rub the full strip firmly for 30 seconds to activate the adhesive — warmth is what bonds it.
When it works: everyday walking, standing work shifts, the painful first hour of the morning.
Technique 2: The Lateral Arch Sling
A variation that adds more support directly under the painful heel/arch.
- Cut a strip the length from your heel to the base of your toes.
- With the foot relaxed, anchor the tape (no tension) on the outside edge of the heel.
- Stretch to 50% tension and lay it across the bottom of the foot, fanning it slightly so it covers the arch's midline.
- Anchor the end (no tension) on the inside of the forefoot near the big toe.
- A second strip, mirrored, can cross the arch perpendicular for a basketweave effect — add it if single-strip support feels insufficient.
- Rub to set.
When it works: days when single-strip support isn't enough; long days on your feet.
Technique 3: The Peroneal/Fascia Strip (Heel-Pain Focus)
This one targets the pull at the heel attachment — the classic "first-step" pain spot.
- Cut a strip from mid-calf length… actually simpler: ankle to the ball of foot length.
- Place the foot in dorsiflexion — toes pulled up toward the shin — before laying tape. This pre-stretches the fascia so the tape supports it in its longest position.
- Anchor (no tension) at the outside of the ankle behind the bone.
- Stretch the tape to moderate tension and sweep it under the sole, along the arch, ending at the ball of the foot (anchor relaxed).
- Add a short perpendicular strip directly over the heel's inner knob if the insertion point itself is sore.
- Rub to set; check that standing feels supported, not strangled.
When it works: sharp heel-insertion pain, sports and running days.
Technique 4: The Full Foot Fan (Maximum Support)
For flare weeks or long events — four short strips fanning across the arch like a ligament-replacement web.
- Cut 4 strips about 6 inches long each, rounding all corners.
- With the foot neutral, anchor all strips on the heel's back edge, one at a time, no tension.
- One by one, stretch each to 25–50% tension and fan them across the sole toward the ball of the foot — spaced like rays: toward big toe, mid-toes, small toes, and one lengthwise along the arch.
- Anchor ends with no tension. Overlap slightly is fine.
- Rub everything down for a full minute.
When it works: race days, 12-hour shifts, flare-ups when even short walks hurt.
How Long to Wear It, and How Often
| Question | Answer |
|---|---|
| How long per application? | 3–5 days is the marketing max; practically, re-tape every 1–2 days for best tension |
| Can I shower with it? | Yes — pat dry, don't scrub |
| Sleep in it? | Fine if comfortable, but you lose little by taping fresh each morning for the first steps |
| Skin irritation? | Remove immediately; some adhesives disagree with some skin. Try hypoallergenic brands |
| Red marks when removed? | Normal from tension; remove slowly in the direction of hair, ideally after a shower |
| How many days in a row? | Give skin a tape-free day weekly; watch for maceration (white, softened skin) |
Watch out for: pulling tape off like a bandage. Slow, downward pulls after a warm shower save your skin and your arch.
Common Mistakes (We See Them All)
- Tension everywhere, including the anchors. The ends must go down slack or the tape pops off by noon.
- Applying to a pointed foot. Pointed toes = pre-shortened fascia = tape that's too loose when you stand.
- Skipping skin prep. Lotion, dust, and hair are tape's three enemies.
- Expecting tape alone to fix it. Tape is a teammate, not the whole team — see below.
- Taping over broken or irritated skin. Never. Let skin heal first.
The Rest of the Team: What to Pair With Tape
Tape works best as part of a routine — each piece below multiplies the others:
- Morning stretching before first steps — flex the foot, stretch the calves for 2 minutes before standing (the classic bottle-roll technique lives in our foot massage guide)
- Supportive shoes and insoles — a structured insole does for 12 hours what tape does for one; our plantar fasciitis insoles guide ranks the current best
- Night splints or socks — keep the fascia gently stretched overnight; see our compression socks analysis
- Weight and load management — less load on the fascia between steps is the quiet variable most guides ignore
When Tape Isn't the Answer
See a professional instead if:
- Pain is sharp, severe, or worsening despite 2–3 weeks of self-care
- You have numbness, tingling, or burning (nerve signs — different problem)
- The heel is swollen, warm, or bruised
- You're diabetic — foot care decisions should include your doctor
- Pain started after a specific injury or fall
A physical therapist can also apply stiffer, specialized taping (like the low-dye technique) with rigid tape — a step up from home kinesiology taping.
FAQ
How long does it take for KT Tape to work for plantar fasciitis?
Support is immediate — the tape helps from the first taped step. Symptom improvement over weeks depends on the whole routine (stretching, footwear, load management), not the tape alone.
Can I wear KT Tape all day for plantar fasciitis?
Yes, kinesiology tape is designed for multi-day wear including showers. Practically, freshness fades — most people get the best support re-taping every 1–2 days, and giving skin one tape-free day per week.
Should I sleep with plantar fasciitis tape on?
You can, but the tape's main job is supporting loaded steps. Many people simply tape fresh each morning before the first steps — the highest-value 10 minutes of the day.
Is KT Tape better than a night splint?
They solve different problems: tape supports steps during the day; night splints hold the fascia stretched overnight to reduce morning pain. Many persistent cases use both — tape by day, splint by night.
What tape tension should I use on the arch?
Anchors (the ends) always go down with zero tension; the working middle section uses 50–75% stretch for arch support. More tension isn't better — it just curls and peels faster.
Can KT Tape fix plantar fasciitis permanently?
No — and be suspicious of any product that claims to. Tape supports the arch and makes steps more comfortable while stretching, footwear, and load management do the actual work of recovery.
Comments